Write | Publish Your Blogger Codes In Stylish CSS Boxes

Write | Publish Your Blogger Codes In Stylish CSS Boxes

Stylish CSS code boxes

Why You Need To Publish Blogger Codes In Stylish Boxes?

Publishing your blog codes without boxes makes your blog look bad and the most important issue is; when you publish your codes without code boxes and backquotes, the crawl robots get confused when they visit your site. Honestly, i myself had published many codes without code boxes and backquotes,. But when i was looking at my blog, it was looking very bad and unprofessional. Therefore, i decided to change my thought. Today, i decided why not i share this tutorial with those who are looking code boxes. Ever needed to post some code into a blog post and you wanted it highlighted, in a box of a different color than the background color of your post? Or, you posted a really long code (javascript / css, etc) in a post and wanted scrollbars on it? Here is how to add it in Blogger with the CSS code. Here, i am going to share two types of boxes. One with scrollbar and other without scrollbar but when you paste a long code inside the second style, it creates the scrollbar automatically.
First, go to your blogger Dashboard > Template > Edit HTML and search for:  ]]></b:skin> and paste this above it:

Style #1
With Code
/* Code Box ----------------------------------------------- */ 
.code { background:pink; background-repeat:no-repeat; border: solid #5C7B90; border-width: 1px 1px 1px 25px; color: black; font: 13px 'Courier New', Courier, monospace; line-height: 16px; margin: 10px 0 10px 10px; max-height: 200px; min-height: 16px; overflow: auto; padding: 10px 10px 10px; width: 90%; } .code:hover { background: #F08080; background-repeat:no-repeat; }
<div class="code">Your code goes here</div>
Style #2
With Code
pre.source-code {background: pink;
background-repeat:no-repeat; border: solid #5C7B90; 
border-width: 1px 1px 1px 25px; color: #000000; 
font: 13px 'Courier New', Courier, monospace; 
line-height: 16px; margin: 1px 1px 1px 25px; max-height: 500px; 
min-height: 16px; overflow: auto; padding: 28px 10px 10px; width: 90%;}
pre.source-code:hover {background: #F08080; background-repeat:no-repeat;}
Now login to your blogger and new post Switch to HTML and paste your code inside this tag
<pre class="source-code">Your code goes here</code></pre>
Online HTML to XML Converter | AdSense Code Converter

Online HTML to XML Converter | AdSense Code Converter

Adsense code Converter
This online tool will convert your HTML code to XML without any error. Parser code that we will create this time can work with ease and simplicity. The workings of the parser code is live copy and paste the script you will change and it will automatically be changed. Script changes will be instantly displayed in the column below. Easy and simple.


Converting HTML to XML

  • Paste your HTML code inside the empty field.
  • Now simply click the Convert button.
  • Copy the converted code and paste it where you need.

Note: This adsense parser or parsing tool can also be used to parse Chitika, Adbrite ads and other JavaScript.
Paste Your Code Inside This Box


Now you're ready to put it in your xml file.
How to Add a Beautiful Email Subscription Form with Feedburner to Blogger

How to Add a Beautiful Email Subscription Form with Feedburner to Blogger

Email Subscription Form with Feedburner to Blogger
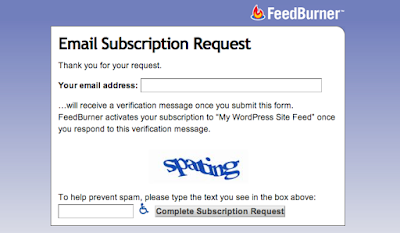
A subscription form lets your subscribed readers to conveniently read your latest blog posts and they are very popular in electronic communications. Newsletters are published by Bloggers, clubs, churches, societies, associations, and businesses—especially companies—to provide information of interest to members, customers, or employees. A newsletter may be considered "informer". Newsletters delivered electronically via email (e-Newsletters) have gained rapid acceptance for the same reasons email in general has gained popularity over printed correspondence. (Wiki)
To be honest, i found this widget from a website but i changed this to my suitable style because i was not sure it's design.

How To Add This Feature To Blogger?
I think your are already familiar with blogger dashboard so, i think it's not necessary to provide ScreenShots to reach to your blogger Dashboard. Therefore, i will guide you with the help of text.

1. Sign in to your blogger
2. Select your blog (In case if you have more than one blog)
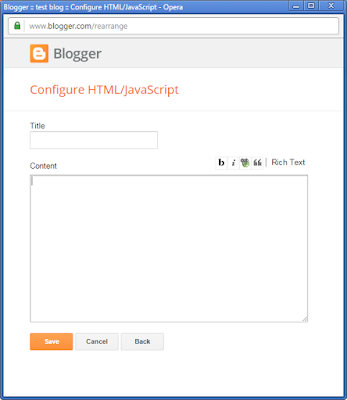
3. Click on Layout and Select Add a Gadget ( A pop up will appear with many options but you have to choose HTML/JavaScript)
4. Now you will see like this:
How to Add a Beautiful Email Subscription Form with Feedburner to Blogger


Now paste the in content area and leave the title area blank by inserting this code <!-->

Copy the entire content code here:

<div align="center" id="knigulper"> <div id="ig-subscription-optin" filter: progid:dximagetransform.microsoft.gradientundefined startcolorstr='#55AAEE', endcolorstr='#003366',gradienttype=0 ); width: 265px;"> <h4 id=knigulper-title-text" style="color: 000; font-size: 20px;"> SUBSCRIBE OUR NEWSLETTER</h4> <div id="knigulper-sub-title-txt" style="color: 000; font-size: 14px;"> Join us for free and get valuable content delivered right through your inbox.</div> <br /> <form action="http://feedburner.google.com/fb/a/mailverify" method="post" onsubmit="window.openundefined'http://feedburner.google.com/fb/a/mailverify?uri=blogspot/CihUG', 'popupwindow', 'scrollbars=yes,width=550,height=520');return true" target="popupwindow"> <input id='sq' name='q' placeholder='Enter Your Name Here' type='text' value=''/><br /> <input id='sq' name='q' placeholder='Enter Your Email Address Here' type='text' value=''/><br /> <div class="separator" style="clear: both; text-align: center;"> </div> <input name="uri" type="hidden" value="blogspot/CihUG" /><input name="loc" type="hidden" value="en_US" /> <input id="knigulper_Submit_Text" style="height: auto; padding: 5px 0;" type="submit" value="Get Access Today!" /></form> </div> </div> <style> #ig-subscription-optin {margin: 0px;padding: 10px;height: auto!important;padding: 0px 10px 15px 15px !important; text-align: center !important;font-family: Georgia, Times, "Times New Roman", serif !important;margin: 10px;margin: 0px;padding: 10px; margin: 8px 0 0 !important;line-height: 22px;font-family: Georgia, Times, "Times New Roman", serif;padding: 5px;border: none;}#ig-subscription-optin p {margin: 8px 0 0 !important;line-height: 22px;font-family: Georgia, Times, "Times New Roman", serif; padding: 5px;border: none;}#ig-subscription-optin input.name { background: white urlundefinedhttp://3.bp.blogspot.com/-Jl2lcnXe42Y/UOb49YMFH8I/AAAAAAAAAiA/hOnOANR83gc/s1600/subscribe-name.png) no-repeat center right;} #ig-subscription-optin input[type="text"] {border: 1px solid #111 !important; font-size: 15px !important;margin-bottom: 10px !important;padding: 8px 28px 8px 10px !important;width: 80% !important;height: auto !important;} #ig-subscription-optin input.email {background: white urlundefinedhttp://2.bp.blogspot.com/-dcien5QLnB8/UOb4N7eNU1I/AAAAAAAAAhw/NxzO8UXjgG4/s1600/subscribe-email.png) no-repeat center right;}#ig-subscription-optin input { font-family: Georgia, Times, "Times New Roman", serif;border-radius: 3px;-moz-border-radius: 3px;-webkit-border-radius: 3px;box-shadow: 0 2px 2px #111;-moz-box-shadow: 0 2px 2px #111;-webkit-box-shadow: 0 2px 2px #111;margin: 0px;padding: 0px;}#ig-subscription-optin h4 {margin-bottom: 8px !important; font-weight: bold !important;line-height: 26px !important;letter-spacing: normal; text-transform: none;text-decoration: none; text-align: center !important;font-family: Georgia, Times, "Times New Roman", serif; border: none;padding: 0px !important;float: none;}input:hover[type="submit"] { background-color: #0094D2;border: 1px solid #0094D2;color: red;text-decoration: none;}input[type="submit"] {background-color: #00A7ED;border: 1px solid #0094D2; color: white;cursor: pointer;font-family: 'Droid Sans', sans-serif !important;font-size: 13px;font-weight: normal;padding: 5px;text-decoration: none;}input { color: #333;font-family: 'Droid Sans', sans-serif;}#ig-subscription-optin input[type="submit"] {background: #f6640e; border: 1px solid #111 !important;color: white;cursor: pointer !important;font-size: 18px !important;font-weight: bold !important; padding: 6px 0 !important;text-shadow: -1px -1px #3A060A !important;width: 90% !important;height: auto !important;line-height: 24px !important;} #ig-subscription-optin input[type="submit"]:hover {color: #FFFC00;}</style> <div style="text-align: right;"> <span style="font-size: xx-small;"></span></div>


Instructions:

  • Before you place the code inside the content area, replace CihUG with you own blogger Feedburner link.
  • You can also replace the button text from "Get Access Today!" to "Subscribe Now", "Join Us Today", "Sign Up Now" bla bla bla.
Download Apowersoft Free Screen Capture

Download Apowersoft Free Screen Capture

Screen Capture tool

Description
Apowersoft Free Screen Capture is a robust application for users to capture the screen, annotate, save, share, and upload the screenshot within one interface.

Apowersoft Free Screen Capture has basic screenshot capture functions and also has advanced features with smart editing and sharing options as well as a task scheduler, which allows users to take scheduled screenshots.

Title: Apowersoft Free Screen Capture 1.3.2
Filename: free-screen-capture.exe
File size: 18.61MB (19,514,840 bytes)
Requirements: Windows (All Versions)
Languages: Multiple languages
Date added: January 25, 2016
Author: Apowersoft www.apowersoft.com

  • DOWNLOAD

Key features include:


  • Capture anything you see on screen.
  • Multiple screenshot mode support.
  • Screenshot sharing support.
  • Powerful image editor.
  • Free cloud storage for storing screenshots.
  • Overall, Apowersoft Free Screen Capture is a great screenshot tool that is simple to use and has some useful advanced features. The application also contains a screen recorder, which is capable of real-time editing.
  • Support various screenshot modes
  • Share screenshots conveniently
Download AlomWare Lights

Download AlomWare Lights

Download AlomWare Lights
Description
AlomWare Lights is a small app that shows the LED status of the Num Lock, Caps Lock, and Scroll Lock keys at the bottom-right corner of your PC's desktop (next to the clock). This is handy for users whose keyboard does not have LED lights to show these states, such as various laptops and/or wireless keyboards.

Unlike other LED indicator apps, AlomWare Lights goes one step further and allows you force Num Lock on, so you don't type blanks instead of numbers without realizing; and you can force Caps Lock off, so that you don't start typing in capitals by mistake.


DOWNLOAD NOW

The app is handy for users whose keyboard doesn't have LED lights to indicate these specific states; various laptops and/or wireless keyboards, for instance.

Although the features are few, it has a couple of cool functions that allow you to force Num Lock on/Caps Lock off, so that you don't start typing in non numerical/capitals accidentally.

AlomWare Lights creates three buttons in the system tray area which switch between the grey and orange colour as the keyboard locking features are enabled or disabled. Each function corresponds to one of the buttons, which are marked accordingly, with “C”, “N” and “S”.

Overall, the app is both simple and lightweight and does not distract you with its unobtrusive style.

Title: AlomWare Lights 1.08
Filename: AlomWare_Lights_Setup.exe
File size: 655KB (670,781 bytes)
Requirements: Windows (All Versions)
Languages: Multiple languages
License: Freeware
Date added: December 18, 2015
Advanced Bat To Exe Converter

Advanced Bat To Exe Converter

Download Advanced Bat To Exe Converter
Description
Advanced BAT to EXE Converter is the best choice to compile your Batch Files to .EXE for distributing commercially. Advanced BAT to EXE Converter not only encrypts your code, but also creates an actual native Windows .EXE program. These .EXE do not require any pre-installed software to function and can be digitally signed.
Even the most complex batch files can be converted to executables with Intelli-Parse technology. This reduces development time by making sure your EXE works exactly as the original batch file does. You can embed your Company name and Copyright information to build your online reputation. Use the "Include Version Info" feature when compiling your project.

Learn the simple batch file language then Compile your script to .EXE It is the easiest and fastest way to develop Windows applications! There are many batch file examples included in the Advanced BAT to EXE Converter menu.

OS: Windows
Size: 801 KB

  • DOWNLOAD
.BAT to .EXE Benefits:   
 
Users of your batch file scripts cannot view/change your code after it is encrypted by the compiler.
 
Any actions performed by the script can be kept secret.
 
Feature to run your scripts "Invisible" in the background without the batch file console window showing.
 
One of the powerful new commands can Launch any Windows program completely Invisible.
 
Executables compiled with Advanced BAT to EXE Converter will run on all Windows versions from Windows98 to Win10 64bit.


Advanced BAT to EXE Converter unique features:

  • Allows Mouse Input for your batch files 
  • Built in editor.
  • Select executable icon for a professional appearance.
  • Encrypts batch file source to keep your code secret.
  • You can set EXE product version and company info properties.
  • Includes Advanced Extended Batch File Commands unavailable in normal batch files. There are many example batch files that utilize these extended commands.
  • Invisible Mode will launch the batch file completely silent. Users will not know any program was launched. 
  • Embed and Encrypt additional dependency files (images, sounds, .exe)
  • Useful for creating installation packages.
  • Helps automate repetitive tasks.
  • Generated .EXE are stand-alone files that do not require any .DLL or .NET framework to run.
  • Works on all Windows 98/ME/2000/XP/2008/Vista/Win7/Win8.1/Win10 32+64bit compatible.
  • MSDOS compile option.
Download RocketDock

Download RocketDock

Download RocketDock

Description

RocketDock is a smoothly animated, alpha blended application launcher. It provides a nice clean interface to drop shortcuts on for easy access and organization. With each item completely customizable there is no end to what you can add and launch from the dock.
Now with added Taskbar support your minimized windows can appear as icons on the dock. This allows for better productivity and accessibility.


  • DOWNLOAD

System Requirements:

Windows 2000/XP/Vista/7
500Mhz or faster CPU
10MB RAM free

Features:


  • Minimize windows to the dock
  • Real-time window previews in Vista
  • Running application indicators
  • Simple drag-n-drop interface
  • Multi-monitor support
  • Supports alpha-blended PNG and ICO icons
  • Icons zoom and transition smoothly
  • Auto-hide and Popup on mouse over
  • Positioning and layering options
  • Fully customizable
  • Completely Portable
  • ObjectDock Docklet support
  • Compatible with MobyDock, ObjectDock, RK Launcher, and Y'z Dock skins
  • Runs great on slower computers
  • Unicode compliant
  • Supports many languages and can easily be translated
  • A friendly user base :)
  • And best of all... its FREE!!!
Download ObjectDock

Download ObjectDock

Download ObjectDock

Description
ObjectDock is an animated dock for Windows that enables you to quickly access and launch your favorite applications, files and shortcuts. ObjectDock can also automatically hide itself when not in use and will reappear when you move your mouse to its position.
Title:                     ObjectDock 2.20
Filename:             ObjectDock.exe
File size:               19.82MB (20,780,784 bytes)
Requirements:     Windows Windows 7 / Windows 7 64-bit / Windows 8 / Windows 8 64-bit                              / Windows 10 / Windows 10 64-bit
Languages:          Multiple languages
License:                Commercial Trial

Date added:         October 6, 2015

  • DOWNLOAD
Download NoMachine

Download NoMachine

Download NoMachine

Description:
NoMachine is a free remote desktop application that has stacks of powerful features. With NoMachine you can access all your files and folders.


NoMachine for Windows

Required OS: Windows i386/AMD64 XP/Vista/7/8/8.1/10


  • Download

NoMachine for Mac OS X

Required OS: Mac OS X Intel 64-bit 10.5 or late


  • Download

NoMachine for Linux

Required OS: Linux i386/AMD64/ARMv6/ARMv7, RHEL 4.4 or later, SUSE 10 or later, Fedora 10 or later, Debian 4 or later, Ubuntu 8.04 or later.


  • DOWNLOAD
Add Verified Badge Author Bio Box Below Every Post In Blogger

Add Verified Badge Author Bio Box Below Every Post In Blogger

Show A Verified Author Bio Box Below Every Post In Blogger
Author box is an important part of the blogger as it describes the writer's Bio to it's visitors however, most customized blog templates are pre-installed author bio box while as some of them are just showing the author name without Author description. Here, i will discuss and try to make you understand about the steps that are responsible to show your author bio box with description and socials icons as well.
I believe, you had already searched your queries with "how to add a verified author bio box in blogger" but you didn't resolve the question. Most bloggers are providing either outdated tutorials or their tutorials are not supporting to your current template. Am i right?

1. Go to your blog dashboard and click Edit HTML
2. Now click anywhere inside the template and press CTRL+F
3. Now search for <h4> or <h/4> (Kindly note, you will find the <h4> or </h4> tags many time so you need to look carefully and now the codes looks like:


<h4>Author: <a href='#' rel='author'><data:post.author/></a> <i class='fa fa-check-circle' style='color:rgb(17, 143, 249)' title='Verified Author'/> </h4>
<p>
<data:post.authorAboutMe/>
</p>
OR something like <h4>Author</h4>
<p>
<data:post.authorAboutMe/>
</p>

4. Now just below the <p><data:post.authorAboutMe/> </p>  paste <p>Write a brief description about yourself here</p>


Demo
Show A Verified Author Bio Box Below Every Post In Blogger

  • Now it's time to show your social icons below your description

1. Below your description, i mean </p> tag paste the following codes:


<div class='authorsocial'>
<a class='img-circle1' href='https://www.facebook.com/' rel='nofollow' target='_blank'><i class='fa fa-facebook'/></a>
<a class='img-circle2' href='https://twitter.com/' rel='nofollow' target='_blank'><i class='fa fa-twitter'/></a>
<a class='img-circle3' href='https://plus.google.com/about' rel='nofollow' target='_blank'><i class='fa fa-google-plus'/></a>
<div class='clr'/>
</div>
2. Finally save your template.

Note: Before follow the tutorial, make sure you have uploaded

a profile picture on your google plus account.


Procedure #2

1. Go to your blog dashboard and click Edit HTML
2. Now click anywhere inside the template and press CTRL+F
3. Now search for <div style='clear:both;'/>
4. Just above the <div style='clear:both;'/> paste the following codes.


<b:if cond='data:blog.pageType == &quot;item&quot;'>
<div class='authorboxwrap'>
<div class='authorboxfull'>
<div class='avatar-container'>
<a href=''>
<img class='author_avatar' expr:alt='data:post.author' expr:src='data:post.authorPhoto.url' height='110' width='110'/>
</a>
</div>
<div class='author_description_container'>
<h4>Author: <a href='#' rel='author'><data:post.author/></a> <i class='fa fa-check-circle' style='color:rgb(17, 143, 249)' title='Verified Author'/> </h4>
<p>
<data:post.authorAboutMe/>
</p>
<p>Write a brief description about your self here</a>
</p>
<div class='authorsocial'>
<a class='img-circle1' href='https://www.facebook.com/' rel='nofollow' target='_blank'><i class='fa fa-facebook'/></a>
<a class='img-circle2' href='https://twitter.com/' rel='nofollow' target='_blank'><i class='fa fa-twitter'/></a>
<a class='img-circle3' href='https://plus.google.com/455895658962201/about' rel='nofollow' target='_blank'><i class='fa fa-google-plus'/></a>
<div class='clr'/>
</div>
</div>
</div>
</div>
<div style='clear:both'/>
</b:if>

Show Author Bio Box Below Every Blogger Post

Show Author Bio Box Below Every Blogger Post

Show Author Bio Box Below Every Blogger Post
Author box is an important part of the blogger as it describes the writer's Bio to it's visitors however, most customized blog templates are pre-installed author bio box while as some of them are just showing the author name without Author description. Here, i will discuss and try to make you understand about the steps that are responsible to show your author bio box with description and socials icons as well.
I believe, you had already searched your queries with "how to add author bio box in blogger" but you didn't resolve the question. Most bloggers are providing either outdated tutorials or their tutorials are not supporting to your current template. Am i right?

What is An Author Bio-Box?

An author boi box is actually is a detailed description of a person's life. It involves more than just the basic facts like education, work, relationships, likes and dislikes, but also portrays a subject's experience of these life events. Unlike a profile or curriculum vitae (RESUME), a biography presents a subject's life story, highlighting various aspects of his or her life, including intimate details of experience, and may include an analysis of the subject's personality.
Now lets follow the Simple guide below:

1. Go to your blog dashboard and click Edit HTML
2. Now click anywhere inside the template and press CTRL+F
3. Now search for <h4> or <h/4> (Kindly note, you will find the <h4> or </h4> tags many time so you need to look carefully and now the codes looks like:
<h4>Author: <a href='#' rel='author'><data:post.author/></a> <i class='fa fa-check-circle' style='color:rgb(17, 143, 249)' title='Verified Author'/> </h4>
<p>
<data:post.authorAboutMe/>       
</p>
OR something like <h4>Author</h4>
<p>
<data:post.authorAboutMe/>       
</p>

4. Now just below the <p><data:post.authorAboutMe/> </p>  paste <p>Write a brief description about yourself here</p>

  • Now it's time to show your social icons below your description

1. Below your description, i mean </p> tag paste the following codes:
<div class='authorsocial'>
<a class='img-circle1' href='https://www.facebook.com/' rel='nofollow' target='_blank'><i class='fa fa-facebook'/></a>
<a class='img-circle2' href='https://twitter.com/' rel='nofollow' target='_blank'><i class='fa fa-twitter'/></a>
<a class='img-circle3' href='https://plus.google.com/about' rel='nofollow' target='_blank'><i class='fa fa-google-plus'/></a>
<div class='clr'/>
</div>
2. Finally save your template.

Note: Before follow the tutorial, make sure you have uploaded

a profile picture on your google plus account.

Demo
Show A Verified Author Bio Box Below Every Post In Blogger


Procedure #2

1. Go to your blog dashboard and click Edit HTML
2. Now click anywhere inside the template and press CTRL+F
3. Now search for <div style='clear:both;'/>
4. Just above the <div style='clear:both;'/> paste the following codes.
<b:if cond='data:blog.pageType == &quot;item&quot;'>
<div class='authorboxwrap'>
<div class='authorboxfull'>
<div class='avatar-container'>
<a href=''>
<img class='author_avatar' expr:alt='data:post.author' expr:src='data:post.authorPhoto.url' height='110' width='110'/>
</a>
</div>
<div class='author_description_container'>
<h4>Author: <a href='#' rel='author'><data:post.author/></a> <i class='fa fa-check-circle' style='color:rgb(17, 143, 249)' title='Verified Author'/> </h4>
<p>
<data:post.authorAboutMe/>       
</p>
<p>Write a brief description about your self here</a>
</p>
<div class='authorsocial'>
<a class='img-circle1' href='https://www.facebook.com/' rel='nofollow' target='_blank'><i class='fa fa-facebook'/></a>
<a class='img-circle2' href='https://twitter.com/' rel='nofollow' target='_blank'><i class='fa fa-twitter'/></a>
<a class='img-circle3' href='https://plus.google.com/455895658962201/about' rel='nofollow' target='_blank'><i class='fa fa-google-plus'/></a>
<div class='clr'/>
</div>
</div>
</div>
</div>
<div style='clear:both'/>
</b:if> 
How to Create a Bootable USB Drive Without Using Any Software

How to Create a Bootable USB Drive Without Using Any Software

How to Create a Bootable USB Drive Without Using Any Software
Making a pen drive bootable is possible in Windows7 & Windows8 operating system. Formatting a computer to install fresh Windows OS with a CD/DVD drive is not very good because it takes too much time to install fresh Windows operating system. There can also be a problem for many people that CD/DVD drive doesn’t work properly. So this can be a problem for them. Today laptop or desktop comes many USB ports. So there is no need of CD/DVD drive to format a system. Formatting is very fast and easy with flash drive/pen drive and also no software is required for this method
To create a bootable USB drive manually, we will use the Command Prompt as a Windows default program. Here are step by step to create a bootable USB drive as the Windows installation media. To create a bootable USB drive as a Windows installation media, we require at least 4 GB for minimum capacity. Larger capacity is better. At this moment, I use the USB flash drive with 2 GB of capacity as just an example. It's due to some reasons that my 4 GB flash drive encountered an unusual problem that i have to fix later.

Step 1: Using DISKPART command

Picture of Using DISKPART command
  1. Insert your USB flash drive to your running computer. As the first step, we need to run Command Prompt as administrator. To do this, we need to find cmd by typing 'cmd' in the search box on Windows Start Menu. After search result for 'cmd' appears, right click on it and select "Run as administrator".
  2. Type 'diskpart' on Command Prompt (without quotes) and hit Enter. Wait for a while until the DISKPART program run.
  3. Type 'list disk' to view active disks on your computer and hit Enter. There would be seen that the active disks shown as Disk 0 for hard drive and Disk 1 for your USB flashdrive with its total capacity.
  4. Type 'select disk 1' to determine that disk 1 would be processed in the next step then hit Enter.
  5. Type 'clean' and hit Enter to remove all of data in the drive.
  6. Type 'create partition primary' and hit Enter. Creating a primary partition and further recognized by Windows as 'partition 1'.
  7. Type 'select partition 1' an hit Enter. Choosing the 'partition 1' for setting up it as an active partition.
  8. Type 'active' and hit Enter. Activating current partition.
  9. Type 'format fs=ntfs quick' and hit Enter. Formatting current partition as NTFS file system quickly.
  10. Type 'exit' and hit Enter. Leaving DISKPART program but don't close the Command Prompt instead. We would still need it for next process.

Step 2: Creating Boot Sector

Let us assume that the flash / USB drive is the D: drive and the DVD installer located on drive F :. The first step, we will navigate Command Prompt to set installation DVD as its active directory.
  1. By default, Command Prompt's active directory for Administrator permission is on C:\Windows\System32>. We will navigate Command Prompt to set on DVD (F:) as its active directory. Just type 'f:' then hit Enter, and the active directory changed to F:.
  2. Type 'cd boot' and hit Enter. Active directory changed to F:\boot>.
  3. Type 'bootsect /nt60 d:' and hit Enter. Creating boot sector on D: drive (USB flash drive).
  4. Type 'exit' and hit Enter to close the Command Prompt. Until this step we have made a bootable USB drive successfully, and the flash drive is ready to be used as a boot media.

Step 3: Copying Installation Files

To install Windows from a bootable USB drive, we just need to copy the whole installation files contained on the DVD installer to flash drive. To do this, open the Command Prompt as in previous steps. Once it opens, type 'xcopy f: \ *. * d: \ / E / H / F' and then press Enter. Wait until all the files in the DVD installer copied to the flash drive. Now bootable USB drive is ready to be used for installing Windows from flash drive and you're done.
Delate All Facebook Messages With A Single Click

Delate All Facebook Messages With A Single Click

Delate All Facebook Messages With A Single Click
The major search query in google is "How to delete all facebook messages at once" but this task is not as same as email deleting. Emails let us easily delete multiple emails at once but facebook......Blash.

Over the past month two of my Facebook friends have had their accounts hacked (that I know). In both of these cases the hacker chose to go through the person’s Facebook emails to read all of their messages and then use that information to message their friends – posing as them. I was one of those people that each hacker messaged. It was a sobering experience to realize that someone could potentially have access to all of your personal discussions that you’ve had with family and friends, going back for years!

After this experience I decided that I wanted to delete all of my past Facebook messages so that if I was ever hacked, at least I could limit what they would have access to. But I discovered that this wasn’t as easy as you would think as there is no global “Delete All” option for Facebook messages and conversations. Instead, you must click into each conversation, click on the “Actions” button, and choose “Delete Conversation”. To do this for the hundreds of conversations that I’ve had on Facebook over the past several years would have been far too time-consuming. However, I did find an amazing plug-in for the Chrome browser called Facebook – Delete All Messages that did the trick.
  1. The process is simple. Open up your Chrome browser and Install The Plugin.
  2. Click “Add to Chrome in order to Install it.
Delate All Facebook Messages

  • Once it you install it, simply sign into Facebook account. and click on the plugin icon that sits on the right corner of the address bar.

Delate All Facebook Messages


  • Then click Take me to my facebook messages. and you will be redirected to you messages.


  • Now launch the facebook cleaner by clicking on the facebook cleaner icon on the address bar.


  • Once again repeat the above step by clicking over the Facebook Cleaner Icon on the address bar and you will see Analyze facebook messages option and click over it.

Delate All Facebook Messages


  • Now you will see the You have some messages to delete! Option and click over the blue circle Click to Clean.


Within  few seconds you will be rid of all your old conversations, and they will not re-appear when the person messages you again. You’ll have a clean slate!
Warning: Once you delete your facebook messages, they cannot be restored/recovered in anyway. Therefore, before deleting the messages, make sure what you're going to do.
Different Types of Meta Tags And Their Functions

Different Types of Meta Tags And Their Functions

Different Types of Meta Tags And Their Functions
There is no doubt that meta tags play a vital role in Search Engine Optimization (SEO) from blogs to websites. However, there are a bunch of meta tags that should be placed into your blogs and websites very carefully. A misplaced meta tag may make your blog description invisible in search engines whether it is Google, Bing, Yahoo or any other else.
The Meta Description tag is still a very important part of the optimization process but not in assigning a rank value. Not only does your description get spidered by the search engine robots, it’s generally your last opportunity to seize the searchers attention and get them to visit your site. A weak or poorly written Description can cripple your chances of getting the traffic you’re trying to get.
Your Meta Description is the text (summary) that is displayed in the search results, just below your page Title. Because the Title is often not enough to get a visitor to click on your site listing, the Meta Description should compliment the Title and offer sufficient incentive for the visitor to click on your site.
Here i am going to explain some useful meta tags that everyone should know about these functions.

Meta Description

<meta content='Write a brief description of you bloghere' name='description'/>

Your Meta Description is the text (summary) that is displayed in the search results, just below your page title. 

Meta Keywords

<meta content='Write your keywords here' name='keywords'/>
Keywords are just like CTRL + F when finding a word in MS Word or MS Excel. Suppose, if you write "Fashion" in your keywords, it will force the search engine to show your blog when a visitor type "Fashion" in search engine.

Social Meta Tag Property

  • <meta content='Your site description goes here' name='twitter:description'/>

This tag is Twitter meta tags. When a link is shared on Twitter, this is where the correct title, description, and image(s) are pulled from.

If you want to add or remove this tag, you have to add/remove the following tags from you template. To add or remove this tag, kindly follow the steps below:

1. Go to your blogger dashboard and Click on Edit Template
2. Click anywhere in your template, and press CTRL+F and search for:

<meta content='' name='twitter:title'/>
<meta content='summary' name='twitter:card'/>
<meta expr:content='data:blog.postImageUrl' name='twitter:image'/>
<meta expr:content='data:blog.homepageUrl' name='twitter:domain'/>

When you find these codes, just remove them. In other words, if you want to add this property in your blog, place these codes in the <head> tag section.

  • <meta content='Your site description goes here' name='og:description'/>
The og (Open Graph) tags are Facebook open graph meta tags. When a link is shared on Facebook, this is where the correct title, description, and image(s) are pulled from.

If you want to add or remove this tag, you have to add/remove the following tags from you template. To add or remove this tag, kindly follow the steps below:

1. Go to your blogger dashboard and Click on Edit Template
2. Click anywhere in your template, and press CTRL+F and search for:

<meta expr:content='data:blog.pageName' property='og:title'/>
<meta expr:content='data:blog.canonicalUrl' property='og:url'/>
<meta content='article' property='og:type'/>
<b:if cond='data:blog.postImageUrl'>
<meta expr:content='data:blog.postImageUrl' property='og:image'/>
<b:if cond='data:blog.postImageThumbnailUrl'>
<meta expr:content='data:blog.postImageThumbnailUrl' property='og:image'/>
<b:if cond='data:blog.metaDescription != &quot;&quot;'>
<meta expr:content='data:blog.metaDescription' name='og:description'/>


When you find these codes, just remove them. In other words, if you want to add this property in your blog, place these codes in the <head> tag section.

Note: While adding these codes in your template, don't forget to start with <b:if and finally close these codes with </b:if> and <b:else/> tags. Here is a clean screenshot that may help you to get your job done.
Different Types of Meta Tags And Their Functions

Now go to your home page and right click on a blank area and click view source code. It will show your meta tags there.Final words: You should add all the properties in order to catch visitors attention towards your site. If remove the facebook and twitter properties, it will not harm your SEO but remember  <meta content='Write a brief description of you bloghere' name='description'/> is very important to display your blog description in search engine as facebook and twitter meta properties are not recognized by the search engines.
Graphics & Web Design Free Books

Graphics & Web Design Free Books

Web Programming Tutorials For Beginners
There's plenty of free advice and tuition out there for web designers. Get your teeth into these great free ebooks.
Looking for Graphics & Web Design Free Books? Well, to need to get bogged down in hefty hardbacks - there's a huge range of digestible eBooks for you to get your teeth into. And most importantly, many of them are free. Here we list of 39 of the best.

Graphics & Web Design Free Books

You can access the eBooks in either PDF and/or HTML format available for free download on this website.
#Book NameBook Author(s)Book Publisher
1HTTP Programming Recipes for Java BotsJeff HeatonFreeware
2HTTP Programming Recipes for C# BotsJeff HeatonFreeware
3Java and XMLFreewareFreeware
4Introduction to Textures, Animation, Audio and Sculpting in Second LifeJeff HeatonFreeware
5Programming Linux GamesJohn R. HallNo Starch Press, Inc
6Introduction to UNIX for Web DevelopersExtropiaExtropia
7GNU Image Manipulation ProgramThe GIMP Documentation TeamThe GIMP Documentation Team
8Basic Graphics Programming With The Xlib LibraryActcomActcom
9The Witch - WineFreewareFreeware
10X Window System Architecture Overview HOWTODaniel ManriqueFreeware
11Basic Graphics Programming With The Xlib LibraryActcomActcom
12AIXwindows Programming GuideInternational Business Machines CorporationInternational Business Machines Corporation
13Gawk: Effective AWK ProgrammingArnold RobbinsGNU
14The AWK Programming LanguageFreewareFreeware
15Vim as XML EditorTobias ReifTobias Reif
16Processing XML with JavaElliotte Rusty HaroldElliotte Rusty Harold
17Interface Design: Best Practices in Object-Oriented API Design in JavaBill VennersBill Venners
18Working with Java and XML - Project GlassFishFreewareO'Reilly, Sun
19The Official Gamelan Java DirectoryRebecca Tapley, Nova Spivak, Jack D. Hidary, Murray Hidary, Alexander Day ChaffeeRebecca Tapley, Nova Spivak, Jack D. Hidary, Murray Hidary, Alexander Day Chaffee
20JDiff - An HTML Report of API DifferencesMatthew B. DoarMatthew B. Doar
21Web Programming with JavaMichael Girdley, Kathryn A. JonesSams.net Publishing
22The Official Gamelan JAVA DirectoryRebecca Tapley, Nova Spivak, Jack D. Hidary, Murray Hidary, Alexander Day ChaffeeEarthWeb, LLC
23Designing Web Services with the J2EETM 1.4 Platform - JAX-RPC, SOAP, and XML TechnologiesInderjeet Singh, Sean Brydon, Greg Murray, Vijay Ramachandran, Thierry Violleau, Beth StearnsSun Microsystems, Inc
24J2ME & GamingJason LamSourceforge.net
25Portals, Portlets and Web Services for Remote PortletsDr. Carsten LeueIBM
26Java Sound Programmer GuideN/ASun Microsystems, Inc
27Java Media Framework API GuideSun Microsystems, IncSun Microsystems, Inc
28Programming in Java Advanced ImagingSun Microsystems, IncSun Microsystems, Inc
29Trail: 2D GraphicsSun Microsystems, IncSun Microsystems, Inc
302D Text TutorialSun Developer NetworkSun Microsystems, Inc
31The Java Web Services TutorialSun Microsystems, IncSun Microsystems, Inc
32Advanced Programming Language Features for Executable Design PatternsGregory T. SullivanMIT Press
33Design PatternsVince HustonN/A
34The Design PatternsJames W. CooperIBM
35Integration PatternsDavid Trowbridge, Gregor Hohpe, Dragos ManolescuMicrosoft Corp.
36Ajax Design PatternsN/AO' Reilly
37Introduction To Design Patterns with JavaBob TarrN/A
38Writing Software PattersMartin FowlerN/A
39Image Processing in C: Analyzing and Enhancing Digital ImagesDwayne PhillipsR&D Publications
Credit: http://freebooks.pupilgarage.com/