Add Stunning Email Subscription Widget to Blogger

Add Stunning Email Subscription Widget to Blogger

Add Stunning Email Subscription Widget to Blogger
Email subscription form let's your blog readers to read your latest blogs updates through their subscribed email inbox. As i have already discussed the benefits of adding an email subscription widgets in my recent post CSS3 Email Subscribe Widget for Blogger and i showed you how to add it in your blogger. 
Today i will show you an amazing email subscription widget with boxes name and email. This is really a nice and professional email subscription widget.


Adding Email Subscription Widget to Your Blogger

Step 1:  Go to Blogger Dashboard  > Template > Edit HTML and past below codes right after <head> tag. 

<link href='https://maxcdn.bootstrapcdn.com/font-awesome/4.4.0/css/font-awesome.min.css' rel='stylesheet' type='text/css'/>
<link href='//fonts.googleapis.com/css?family=PT+Sans:400,700' rel='stylesheet' type='text/css'/>
If this is already installed in your blogger template then skip the step one and follow the step no. 2.

Step 2: Go to Blogger Dashboard  > Layout > Add a Gadget > HTML/JavaScript and past below codes.
<style type='text/css'>
#subscribe-box {background-color:#FFA07A;font-family: 'PT Sans', sans-serif; color:#8B0000; border:#858585 dashed 2px }
#subscribe-box p {font-size:22px;color:#8B0000;line-height:20px;padding:10px 20px 0 20px;margin:0;}
#subscribe-box .emailfield {padding:0px 20px 10px;}
#subscribe-box .emailfield input {background:#f9f9f9;color:#bbb;padding:10px;margin-top:10px;font-size:13px;width:91%;border:0;transition:all 0.4s ease-in-out;}
#subscribe-box .emailfield input:focus {background:#fff;outline:none;color:#888;}
#subscribe-box .emailfield .submitbutton {background:#444;color:#fff;text-transform:uppercase;font-weight:700;font-size:18px;font-family: 'PT Sans', sans-serif;;border:none;outline:none;width:100%;cursor:pointer;border-radius:3px;transition:all 0.4s ease-in-out;}
#subscribe-box .emailfield .submitbutton:active {outline:none;border:none;background:#fff;color:#e25734;}#subscribe-box .emailfield .submitbutton:hover{background:#fff;color:#444;}
.creadit a{color: #A7A6A6; float: right; font-size: 8px
</style>
<div id="subscribe-box">
<center>
Get our Latest Updates Right Straight to Your Inbox</center>
<div class="emailfield">
<form action="http://feedburner.google.com/fb/a/mailverify?uri=knigulper" method="post" onsubmit="window.open('http://feedburner.google.com/fb/a/mailverify?uri=knigulper, 'popupwindow', 'scrollbars=yes,width=550,height=520');return true" target="popupwindow"><input name="name" onblur="if (this.value == &quot;&quot;) {this.value = &quot;Your Name&quot;;}" onfocus="if (this.value == &quot;Your Name&quot;) {this.value = &quot;&quot;;}" type="text" value="Your Name" />
<input name="email" onblur="if (this.value == &quot;&quot;) {this.value = &quot;Your Email&quot;;}" onfocus="if (this.value == &quot;Your Email&quot;) {this.value = &quot;&quot;;}" type="text" value="Your Email" />
<input name="uri" type="hidden" value="knigulper" /><input name="loc" type="hidden" value="en_US" />
<input class="submitbutton" type="submit" value="Subscribe Now" />
</form>
</div>
</div>
<div class="creadit">
<a href="/" rel="dofollow" target="_blank"> Get This Widget</a></div>

Customization
Note: Replace the blue text with your own feedburner username.
Change the bold color codes that suits to your blog or let it be.

Facebook Keyboard Shortcut Keys and Commands

Facebook Keyboard Shortcut Keys and Commands

Facebook Keyboard Shortcut Keys
Facebook is the world's largest and smartest social network where you can interact with your loved once. Millions of people are browsing the Facebook in their daily lives however, they are still not aware how to browse it faster, wiser and smartly. Today, i will show you Facebook keyboard shortcuts commands which let's a user to perform the operations quickly.


Read Also: 100 Amazing Keyboard Shortcuts and Their functions (Windows)

Facebook Shortcut Keys for Chrome & Explorer

  1. Alt + 1 = Facebook Home Page
  2. Alt + 2 = Profile Page
  3. Alt + 3 = Friend Request List
  4. Alt + 4 = Latest Messages List
  5. Alt + M = Create New Message
  6. Alt + 5 = Notification List
  7. Alt + 6 = Account Setting Page
  8. Alt + 7 = Account Privacy Configuration Page
  9. Alt + 8 = Facebook Fan Page ( Facebook Profile )
  10. Alt + 9 = Fb Terms and Statement (Rights & Responsibilities )
  11. Alt + 0 = Facebook Help Center
  12. Alt + ? = Search Box ( Search Option )

Facebook Short Cuts Keys For Mozilla Firefox

  1. Shift + Alt + 1 = Facebook Home Page
  2. Shift + Alt + 2 = Profile Page
  3. Shift + Alt + 3 = Friend Request List
  4. Shift + Alt + 4 = Latest Messages List
  5. Shift + Alt + M = Create New Message
  6. Shift + Alt + 5 = Notification List
  7. Shift + Alt + 6 = Account Setting Page
  8. Shift + Alt + 7 = Account Privacy Configuration Page
  9. Shift + Alt + 8 = Facebook Fan Page ( Facebook Profile )
  10. Shift + Alt + 9 = Fb Terms and Statement (Rights & Responsibilities )
  11. Shift + Alt + 0 = Facebook Help Center
  12. Shift + Alt + ? = Search Box ( Search Option )

Facebook Web Messenger Keyboard Shortcuts

  1. CTRL + G = Search conversations
  2. CTRL + Q = Show/hide keyboard shortcuts
  3. CTRL + Del = Archive/unarchive conversation
  4. CTRL + J = Mark as spam
  5. CTRL + M = Start a new message
  6. CTRL + I = Go to Inbox
  7. CTRL + U = Go to Other

If this trick helped you a bit, then share with your friends.
Increase Your Blogger SEO With Images

Increase Your Blogger SEO With Images

Increase Your Blogger SEO With Images
Search engine Optimization is the most critical part for any Blogger. If you write hundred of contents but they are not visible to Search Engines, think all your invisible contents are for no use. Here i will share how attained better SEO results with the images.
Search Engines are very smart they look the relevancy of your images that you publish with your articles. A successful blogger should focus on better SEO. Blogger {blogspot.com} is a great service which provides the users a convenient way to deal with blogspot sites which are easy to use.

Read Also: Top 10 meta tags for Blogger and Websites


Bad SEO Image File Formats 

Many times when you publish an image on the web they are not indexed and crawled by the Search Engines due to invalid image formats like .JPEG/JFIF, .Exif, .TIFF, .GIF, .BMP, .PPM, .PGM, .PBM, .PNM, .BAT, .HEIF and many other.


Change Your Image File Format for Better SEO

The better SEO image is .PNG. It is a raster graphics file format that supports lossless data compression. The file format .png is the top widely used lossless image compression format on the Internet.
Right click on the image > Open With > Paint.
Now rename the image with the relevant text. Use the hyphen among the words instead of pressing the spacebar. I presume, you want to type the Blogger is a great service so you have to include the hyphen (-) like this Blogger-is-a-great-service. This text will work as an Alt tag and select .PNG file format and hit Save. (See the ScreenShot)
Increase Your Blogger SEO With Images


Now go to your blogger and upload the image. When you finish the uploading, left click o the image and select properties where you need to write the Title in title text box and the Alt text in alt text box of the content and hit OK.
Note:- Enter the text in Alt Text box that you have entered while renaming the image.
Increase Your Blogger SEO With Images

Now your blogger images will start indexing and it will increase your page-rank in Google and in other search engines. 
JIOFi Hotspot Network Blinking and It's Solution

JIOFi Hotspot Network Blinking and It's Solution

JIOFi Network Blinking Unable to Connect and It's Solution
JIO Reliance is the largest 4G network in India offers high speed mobile internet as LTE (Long Term Evolution) across the country and  It is a wholly owned subsidiary of Reliance Telecommunication Pvt. Ltd.
Few days ago i brought a JIOFi 3 device for my PC and when i inserted the SIM card inside the SIM slot, it showed me the Network Blinking that was very frustrated and suddenly i remembered the Google search term and i tried alot while googling to find a solution for this problem but unfortunately, i didn't find anything that could solve my problem. So, finally i got an idea to resolve this headache and i removed the battery again then i found that SIM card wasn't inserted properly. Today i decided that there are many such new users who are currently facing such problems so today i am going to share my experience with them.
The lights on your JioFi device are indicators for battery, 4G network connectivity and WiFi connectivity status. While JioFi allows you to connect up to 31 devices, it is recommended that you don’t connect more than 12 devices at once because it will slow down your internet speed.


Before you scroll down to the steps, here are few points to remember:

JioFi Battery Indicators:

Solid Red
Battery high/AC adaptor connected without battery inside.
Slow blinking: Charging while battery is high.
Solid Blue
Battery medium.
Slow blinking: Charging while battery is low
Solid Deep Red
Battery low.
Slow blinking: Charging while battery is low

JioFi Network Signal Indicators:

Solid Red
Good Signal coverage.
Solid Blue
Fair Signal coverage.
Solid Deep Red
Poor Signal coverage.
Slow blinking: No SIM card/SIM card error/No service

JioFi WiFi Signal Indicators:

Solid Blue
WiFi ON but no device is connected.
Slow blinking: Sleep mode
Solid Red
One or more devices connected.
Blink: WPS active

How to Fix JioFi Network Blinking

  • Dial 1977 to activate the Voice call Services.
  • Dial 1800-890-1977 to activate the Data Services.
  • Open the back cover of your JioFi device and remove the battery.
  • Insert the SIM card properly with the chip facing down (Don't worry! exert force while pushing the SIM card inside the SIM slot in JioFi 3). There are two slots one for SIM card and another for SD card so make sure you insert the SIM inside the SIM slot.
  • Now insert the battery and close the back cover. Setup is done . Turn ON your JioFi by pressing the Power key.
  • Press the WPS button for 2-5 seconds to activate the Network connectivity.
  • Now go to http://jiofi.local.html/  JioFi Web Configuration Panel or click Here  and click the login button located upper right corner. (Note: You must be connected to your JioFi device to access this page or it will show you DNS error).
  • Type administrator for your username and password as well click Login. (Follow the ScreenShot)

JIOFi Network Blinking Unable to Connect
Now you can change you password and SSID name from the JioFi Web Configuration Panel page.

Create Pop-Up Welcome Message for Blogger Visitors

Create Pop-Up Welcome Message for Blogger Visitors

Create Pop-Up Welcome Message for Blogger
Every time your blogs are visited by many blog readers and i say you should welcome them by a special message or just say Welcome to (your blog name). There are many pop-ups that i have already mentioned and they are:  Awesome Pop up Email Subscription box for Blogger  and   Add Flat Popup Facebook Like Box Widget for Blogger  but today i will show you about Welcome pop-up message.

Adding Welcome Pop-Up Message

  1. Go to you Blogger >>   Template>>   Edit Template.
  2. Click inside the template editor and press Ctrl + F to locate the </body>.
  3. Just above the </body> tag, past the following codes and Save your template.
  4. Now refresh the blogger page and see the results.

  • View Results
<script> function MYALERT() {
alert("Welcome to Knigulper"); } MYALERT()
</script>

Note: Change the Knigulper with your blogger name.
Related Post Widget for Blogger With Practical Examples

Related Post Widget for Blogger With Practical Examples

Related Post Widget for Blogger With Practical Examples
Last month i visited the many blogs to check their SEO and their design but what i see is that i found 20%  blogs without Related Post Widget and some others without Recent Post Widget. After all i checked the Google Page Rank and unfortunately, their ranks are very poor. Do you know why? Wait... let me explain.


What is Related Post Widget?

 Related Post Widget are the links displayed below the blog/website post, images, videos and articles. It is created with the combination of JavaScript CSS and HTML. It's main purpose is to keep a blog reader stay on your blog. So it increases the page previews that's the best for Google page rank.

How Does Related Post Widget Works?

Related Post Widget works with the Labels. If there is no label, there is not related post. So, before you follow this tutorial, make sure that you have published your blog posts within the labels.

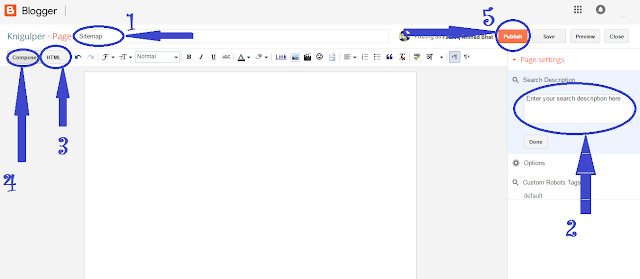
How to Add Labels In Blogger Posts?

If you are going to publish a new blog post just click create New Post and text editor will get open now you will see the Labels or if you have already published a many blog post, click Edit and then enter your label name. You have to follow the same procedure for each post individually. (ScreenShot)

How to Add Labels In Blogger Posts

Enter your label name and click Done.

Adding Related Post Widget to Blogger

  1. Login to you Blogger and Navigate to the Template >>  Edit HTML.
  2. Click anywhere inside the Template Editor Press + F and locate the  <b:includabe'>.
Just above the <b:includabe'> tag, past the below code.
<!-- Related Posts widget by http://knigulper.blogspot.com/-->
<b:if cond='data:blog.pageType == &quot;item&quot;'>
<b:loop values='data:post.labels' var='label'>
<b:if cond='data:label.isLast != &quot;true&quot;'>
</b:if>
<script expr:src='&quot;/feeds/posts/default/-/&quot; + data:label.name + &quot;?alt=json-in-script&amp;callback=readpostlabels&amp;max-results=50&quot;' type='text/javascript'/>
</b:loop>
  <div class='post-footer-line post-footer-line-4'>
   <div class='relatedpoststitle'>RELATED POSTS</div>
<div id='relatedpostssum'>
      <script type='text/javascript'>showrelated();</script>
    </div>
    <div style='clear:both;'/>
  </div>
</b:if>
<!-- Related Posts with Thumbnails Code End by http://knigulper.blogspot.com/-->
3. Now again click Press + F and locate the </head> tag
4. Paste the following CSS and JavaScript code just above the </head> 

Style 1:
<script type='text/javascript'>
//<![CDATA[
var relatedTitles = new Array();
var relatedUrls = new Array();
var relatedpSummary = new Array();
var relatedThumb = new Array();
var relatedTitlesNum = 0;
var relatedPostsNum = 4; // number of entries to be shown
var relatedmaxnum = 75; // the number of characters of summary
var relatednoimage = "https://3.bp.blogspot.com/-PpjfsStySz0/UF91FE7rxfI/AAAAAAAACl8/092MmUHSFQ0/s1600/no_image.jpg"; // default picture for entries with no image
function readpostlabels(e){for(var t,r,l,a=0;a<e.feed.entry.length&&(t=e.feed.entry[a],a!=e.feed.entry.length);a++){relatedTitles[relatedTitlesNum]=t.title.$t,l="","content"in t?l=t.content.$t:"summary"in t&&(l=t.summary.$t),relatedpSummary[relatedTitlesNum]=removetags(l,relatedmaxnum),r="media$thumbnail"in t?t.media$thumbnail.url:relatednoimage,relatedThumb[relatedTitlesNum]=r;for(var d=0;d<t.link.length;d++)if("alternate"==t.link[d].rel){relatedUrls[relatedTitlesNum]=t.link[d].href;break}relatedTitlesNum++}}function showrelated(){for(var e=new Array(0),t=new Array(0),r=new Array(0),l=new Array(0),a=0;a<relatedUrls.length;a++)contains(e,relatedUrls[a])||(e.length+=1,e[e.length-1]=relatedUrls[a],t.length+=1,t[t.length-1]=relatedTitles[a],r.length+=1,r[r.length-1]=relatedpSummary[a],l.length+=1,l[l.length-1]=relatedThumb[a]);relatedTitles=t,relatedUrls=e,relatedpSummary=r,relatedThumb=l;for(var a=0;a<relatedTitles.length;a++){var d=Math.floor((relatedTitles.length-1)*Math.random()),n=relatedTitles[a],s=relatedUrls[a],m=relatedpSummary[a],i=relatedThumb[a];relatedTitles[a]=relatedTitles[d],relatedUrls[a]=relatedUrls[d],relatedpSummary[a]=relatedpSummary[d],relatedThumb[a]=relatedThumb[d],relatedTitles[d]=n,relatedUrls[d]=s,relatedpSummary[d]=m,relatedThumb[d]=i}for(var u,h=0,o=Math.floor((relatedTitles.length-1)*Math.random()),g=o,f=document.URL;h<relatedPostsNum&&(relatedUrls[o]==f||(u="<div class='relatedsumposts'>",u+="<a href='"+relatedUrls[o]+"' title='"+relatedTitles[o]+"'><img src='"+relatedThumb[o]+"' /></a>",u+="<h6><a href='"+relatedUrls[o]+"' target='_self'>"+relatedTitles[o]+"</a></h6>",u+="<p>"+relatedpSummary[o]+" ... </p>",u+="</div>",document.write(u),h++,h!=relatedPostsNum))&&(o<relatedTitles.length-1?o++:o=0,o!=g););}function removetags(e,t){for(var r=e.split("<"),l=0;l<r.length;l++)-1!=r[l].indexOf(">")&&(r[l]=r[l].substring(r[l].indexOf(">")+1,r[l].length));return r=r.join(""),r=r.substring(0,t-1)}function contains(e,t){for(var r=0;r<e.length;r++)if(e[r]==t)return!0;return!1}
//]]>
</script>

<style>
.relatedsumposts {margin:0 auto;padding:0;text-align:center;
/* width of the related posts area */
width: 120px;
float:left;margin-bottom:15px;
border-right: 1px dotted #E5E5E5;
display: inline-block;
}
.relatedsumposts h6 {
margin: 5px 0;
}
.relatedsumposts h6 a {
/* link properties */
color: #linkcolor;
text-transform: uppercase;
font-size:12px;
}
.relatedsumposts img{background-color:#fafafa;width:95%;height:auto;max-width:100%;margin:0 auto;vertical-align:middle;}
.relatedsumposts p {
/* summary properties */
border-top: 1px solid #E5E5E5;
border-bottom: 1px solid #E5E5E5;
color: #summarycolor;
font-size: 12px;
height: 4em;
line-height: 1;
margin: 5px 0 0;
padding: 5px 0 15px 0;
}
#relatedpostssum {
width: 100%;
}
.relatedpoststitle {
font-size: 19px;
margin-bottom:15px; ;text-align:center; font-style:bold}
</style>

Related Post Widget for Blogger style 1


Style 2
<script type='text/javascript'>
//<![CDATA[
var relatedTitles = new Array();
var relatedUrls = new Array();
var relatedpSummary = new Array();
var relatedThumb = new Array();
var relatedTitlesNum = 0;
var relatedPostsNum = 4; // number of entries to be shown
var relatedmaxnum = 75; // the number of characters of summary
var relatednoimage = "https://3.bp.blogspot.com/-PpjfsStySz0/UF91FE7rxfI/AAAAAAAACl8/092MmUHSFQ0/s1600/no_image.jpg"; // default picture for entries with no image
function readpostlabels(e){for(var t,r,l,a=0;a<e.feed.entry.length&&(t=e.feed.entry[a],a!=e.feed.entry.length);a++){relatedTitles[relatedTitlesNum]=t.title.$t,l="","content"in t?l=t.content.$t:"summary"in t&&(l=t.summary.$t),relatedpSummary[relatedTitlesNum]=removetags(l,relatedmaxnum),r="media$thumbnail"in t?t.media$thumbnail.url:relatednoimage,relatedThumb[relatedTitlesNum]=r;for(var d=0;d<t.link.length;d++)if("alternate"==t.link[d].rel){relatedUrls[relatedTitlesNum]=t.link[d].href;break}relatedTitlesNum++}}function showrelated(){for(var e=new Array(0),t=new Array(0),r=new Array(0),l=new Array(0),a=0;a<relatedUrls.length;a++)contains(e,relatedUrls[a])||(e.length+=1,e[e.length-1]=relatedUrls[a],t.length+=1,t[t.length-1]=relatedTitles[a],r.length+=1,r[r.length-1]=relatedpSummary[a],l.length+=1,l[l.length-1]=relatedThumb[a]);relatedTitles=t,relatedUrls=e,relatedpSummary=r,relatedThumb=l;for(var a=0;a<relatedTitles.length;a++){var d=Math.floor((relatedTitles.length-1)*Math.random()),n=relatedTitles[a],s=relatedUrls[a],m=relatedpSummary[a],i=relatedThumb[a];relatedTitles[a]=relatedTitles[d],relatedUrls[a]=relatedUrls[d],relatedpSummary[a]=relatedpSummary[d],relatedThumb[a]=relatedThumb[d],relatedTitles[d]=n,relatedUrls[d]=s,relatedpSummary[d]=m,relatedThumb[d]=i}for(var u,h=0,o=Math.floor((relatedTitles.length-1)*Math.random()),g=o,f=document.URL;h<relatedPostsNum&&(relatedUrls[o]==f||(u="<div class='relatedsumposts'>",u+="<a href='"+relatedUrls[o]+"' title='"+relatedTitles[o]+"'><img src='"+relatedThumb[o]+"' /></a>",u+="<h6><a href='"+relatedUrls[o]+"' target='_self'>"+relatedTitles[o]+"</a></h6>",u+="<p>"+relatedpSummary[o]+" ... </p>",u+="</div>",document.write(u),h++,h!=relatedPostsNum))&&(o<relatedTitles.length-1?o++:o=0,o!=g););}function removetags(e,t){for(var r=e.split("<"),l=0;l<r.length;l++)-1!=r[l].indexOf(">")&&(r[l]=r[l].substring(r[l].indexOf(">")+1,r[l].length));return r=r.join(""),r=r.substring(0,t-1)}function contains(e,t){for(var r=0;r<e.length;r++)if(e[r]==t)return!0;return!1}
//]]>
</script>

<style>
.relatedsumposts {
padding: 0px 10px;
text-align: center;
/* width of the related posts area */
width: 120px;
float:left;margin-bottom:15px;
border-right: 1px dotted #E5E5E5;
display: inline-block;
}
.relatedsumposts h6 {
margin: 5px 0;
}
.relatedsumposts h6 a {
/* link properties */
color: #linkcolor;
text-transform: uppercase;
font-size:12px;
}
.relatedsumposts img {
/* thumbnail properties */
height: 82px;
width: 82px;
-webkit-border-radius: 50%;
-moz-border-radius: 50%;
border-radius: 50%;
}
.relatedsumposts p {
/* summary properties */
border-top: 1px dotted #E5E5E5;
border-bottom: 1px dotted #E5E5E5;
color: #summarycolor;
font-size: 10px;
height: 4em;
line-height: 1;
margin: 5px 0 0;
padding: 5px 0 15px 0;
}
#relatedpostssum {
width: 100%;
}
.relatedpoststitle {
font-size: 19px;
margin-bottom:15px;
}
</style>

Related Post Widget for Blogger style 2
Style 3
<script type='text/javascript'>
var labelArray = [<b:if cond='data:post.labels'><b:loop values='data:post.labels' var='label'>
          &quot;<data:label.name/>&quot;<b:if cond='data:label.isLast != &quot;true&quot;'>,</b:if>
      </b:loop></b:if>];
var relatedPostConfig = {
      homePage: &quot;<data:blog.homepageUrl/>&quot;,
      widgetTitle: &quot;&lt;h4&gt;Related Posts:&lt;/h4&gt;&quot;,
      numPosts: 4,
      summaryLength: 70,
      titleLength: &quot;auto&quot;,
      thumbnailSize: 100,
      noImage: &quot;&quot;,
      containerId: &quot;bpostrelated-post&quot;,
      newTabLink: false,
      moreText: &quot;Read More&quot;,
      widgetStyle: 2,
      callBack: function() {}
};
</script>

<style>
.related-postbwrap{width:100%;float:left;background:#fff;-moz-border-radius: 5px; -webkit-border-radius: 5px; border-radius: 5px; border: 1px solid #E6E6E6;margin-bottom:10px;}
.related-postbwrap h4{color: #2D2D2D; font-size: 15px; font-weight: bold; margin-bottom: 10px; text-align: left; text-transform: capitalize; margin: 0; background: #FCFCFC; padding: 15px; border-bottom: 1px solid #E6E6E6;}
.related-post-style-2,.related-post-style-2 li{list-style:none;margin:0}
.related-post-style-2 li{overflow:hidden;padding:10px 0;line-height:.9;width:47%;float:left;margin-right:20px}
.related-post-style-2 .related-post-item-thumbnail{width:100px;height:85px;max-width:none;max-height:none;background-color:transparent;border:none;float:left;margin:2px 10px 0 0;padding:0}
.related-post-style-2 .related-post-item-title{font-weight:700;font-size:13px;color:#2D2D5A;font-family:raleway;}
.related-post-style-2 .related-post-item-summary{display:block;font-size:12px;font-weight:600;margin-top:5px;line-height:1.3}
.related-post-item-more{display:none}
.related-postbwrap ul {padding:10px;overflow: hidden;}
.post-body {width:auto!important;}
.related-post-item-title {font-size:12px!important;}
.related-post-style-2 li {width:100%;}
.related-postbwrap {width:100%;}
.related-post-style-2 li {width:100%!important}
</style>

Related Post Widget for Blogger style 3

Important: Kindly note, you must follow the Step 2 for each style.
How to Unsubscribe Emails from Gmail At Once

How to Unsubscribe Emails from Gmail At Once

How to Unsubscribe Emails At Once Gmail inbox
Email (Electronic Mail) are the instant messaging system based on store and forward features. Email servers accept, forward, deliver, and store messages. Neither the users nor their computers are required to be online simultaneously, they need to connect only briefly, typically to a mail server, for as long as it takes to send or receive messages.

How You Get Unwanted Emails?

Basically, whenever you visit any online service, they ask you to provide your email address and they record/note your email or either sell it to other online services and start spamming you mail box by sending you the hundreds of emails daily, weekly or either monthly for promoting their products or services. However, if you open any mail from your inbox, there is a Unsubscribe link but it takes decades to unsubscribe to those mail one by one. Therefore today i decided to show you a short and easy way to get rid of this major problem. Here is a step by step guide that you should follow correctly.

Unsubscribing Junk Emails from Inbox

Login to you Gmail account and click the checkbox to select all emails. You can deselect emails one by one you'd like to be subscribed from. (Screenshot below).

How to Unsubscribe Emails At Once (Gmail)

Click the (!) icon as shown in the picture.

How to Unsubscribe Emails At Once


Now the next and last step is, click the Report Spam & Unsubscribe.

How to Unsubscribe Emails At Once knigulper


Stay tuned with us. 
How to Create HTML Sitemap Page in Blogger

How to Create HTML Sitemap Page in Blogger

How to Create HTML Sitemap Page in Blogger
A site map is a model of a website's content designed to help both users and search engines navigate the site. A site map can be a hierarchical list of published pages and posts on your blogger or website organized by topics in a single page. Here i will show you the step by step guide to create HTML Sitemap page for your blogger.


Adding an HTML Sitemap Page in Blogger

  • Go to your blogger and navigate to the pages and click Create New Page and give it a title Sitemap
  • Now you will see a blank page. Switch to HTML and paste the below code then press Compose finally click Publish and you are done.
Follow the ScreenShot


<div id="bp_toc">
</div>
<script src="https://cdn.rawgit.com/knigulper/github.io/gh-pages/www.knigulper.com/sitemap.js" type="text/javascript"></script>
<script src="/feeds/posts/summary?alt=json-in-script&amp;max-results=9999&amp;callback=loadtoc" type="text/javascript"></script>
</div>
Important: Do not make any change in the above code otherwise this will not work
  • View Results

Now Design your Sitemap with a Beautiful look

Go to Blogger >> Template >> Edit HTML >> Search for ]]></b:skin> tag or </style> tag and just above it paste the following code. You can also customize the below codes to match your style of template color scheme:

/* Sitemap plugin By Knigulper */#bp_toc {    color: #666;    margin: 0 auto;    padding: 0;    border: 1px solid #d2d2d2;    float: left;    width: 100%;}span.toc-note {    display: none;}#bp_toc tr:nth-child(2n) {    background: #f5f5f5;}td.toc-entry-col1 a {    font-weight: bold;    font-size: 14px;}.toc-header-col1,.toc-header-col2,.toc-header-col3  {background:#9E9E9E;}.toc-header-col1 {    padding: 10px;    width: 250px;}.toc-header-col2 {    padding: 10px;    width: 75px;}.toc-header-col3 {    padding: 10px;    width: 125px;}.toc-header-col1 a:link,.toc-header-col1 a:visited,.toc-header-col2 a:link,.toc-header-col2 a:visited,.toc-header-col3 a:link,.toc-header-col3 a:visited {    font-size: 13px;    text-decoration: none;    color: #fff;    font-weight: 700;    letter-spacing: 0.5px;}.toc-header-col1 a:hover,.toc-header-col2 a:hover,.toc-header-col3 a:hover {    text-decoration: none;}.toc-entry-col1,.toc-entry-col2,.toc-entry-col3 {    padding: 5px;    padding-left: 5px;    font-size: 12px;}.toc-entry-col1 a,.toc-entry-col2 a,.toc-entry-col3 a {    color: #666;    font-size: 13px;    text-decoration: none}.toc-entry-col1 a:hover,.toc-entry-col2 a:hover,.toc-entry-col3 a:hover {    text-decoration:underline;}#bp_toc table {    width: 100%;    margin: 0 auto;    counter-reset: rowNumber;}.toc-entry-col1 {    counter-increment: rowNumber;}#bp_toc table tr td.toc-entry-col1:first-child::before {    content: counter(rowNumber);    min-width: 1em;       min-height: 3em;    float: left;    border-right: 1px solid #fff;    text-align: center;    padding: 0px 11px 1px 6px;    margin-right: 15px;}td.toc-entry-col2 {    text-align: center;}
I hope you liked the tutorial. Download pdf
Code Beautifier | Syntax Highlighter-Pretty Print

Code Beautifier | Syntax Highlighter-Pretty Print

Code Beautifier | Syntax Highlighter | Pretty Print
In this post, i will show you some stylish examples of CSS code beautifying with source code so that you can change the look of your blog or website posts in an easy way.


What is Pretty-print?

Prettyprint (or pretty-print) is the application of any of various stylistic formatting conventions to text files, such as source code, markup, and similar kinds of content. These formatting conventions can adjust positioning and spacing (indent style), add color and contrast (syntax highlighting), adjust size, and make similar modifications intended to make the content easier for people to view, read, and understand. Prettyprinters for programming language source code are sometimes called code beautifiers or syntax highlighters.


Programming code formatting and beautification

Programmers often use tools to format programming language source code in a particular manner. Proper code formatting makes it easier to read and understand. Different programmers often prefer different styles of formatting, such as the use of code indentation and whitespace or positioning of braces. A code formatter converts source code from one format style to another. This is relatively straightforward because of the unambiguous syntax of programming languages. Code beautification involves parsing the source code into component structures, such as assignment statements, if blocks, loops, etc.  and formatting them in a manner specified by the user in a configuration file.

Code beautifiers exist as standalone applications and built into text editors and integrated development environments. For example, Emacs' various language modes can correctly indent blocks of code attractively

Here are some Code beautification examples with source code. Select the desired one that suits your style or choice.

1. Autumn Style with Source Code

1
print 
<!-- HTML generated by techysourcee.blogspot.com -->
<div style="background: #ffffff; overflow:auto;width:auto;border:solid gray;border-width:.1em .1em .1em .8em;padding:.2em .6em;"><table><tr><td><pre style="margin: 0; line-height: 125%">1</pre></td><td><pre style="margin: 0; line-height: 125%"><span style="color: #1e90ff; font-weight: bold">print</span> <span style="color: #aa5500">&#39;hello world!&#39;</span>
</pre></td></tr></table></div>

2. Borland Style with Source Code

1
print 
<!-- HTML generated by techysourcee.blogspot.com -->
<div style="background: #ffffff; overflow:auto;width:auto;border:solid gray;border-width:.1em .1em .1em .8em;padding:.2em .6em;"><table><tr><td><pre style="margin: 0; line-height: 125%">1</pre></td><td><pre style="margin: 0; line-height: 125%"><span style="color: #000080; font-weight: bold">print</span> <span style="color: #0000FF">&#39;hello world!&#39;</span>
</pre></td></tr></table></div>

3. BW Style with Source Code

1
print 
<!-- HTML generated by techysourcee.blogspot.com -->
<div style="background: #ffffff; overflow:auto;width:auto;border:solid gray;border-width:.1em .1em .1em .8em;padding:.2em .6em;"><table><tr><td><pre style="margin: 0; line-height: 125%">1</pre></td><td><pre style="margin: 0; line-height: 125%"><span style="font-weight: bold">print</span> <span style="font-style: italic">&#39;hello world!&#39;</span>
</pre></td></tr></table></div>

4. Colorful Style with Source Code

1
print 
<!-- HTML generated by techysourcee.blogspot.com -->
<div style="background: #ffffff; overflow:auto;width:auto;border:solid gray;border-width:.1em .1em .1em .8em;padding:.2em .6em;"><table><tr><td><pre style="margin: 0; line-height: 125%">1</pre></td><td><pre style="margin: 0; line-height: 125%"><span style="color: #007700">print</span> <span style="background-color: #fff0f0">&#39;hello world!&#39;</span>
</pre></td></tr></table></div>

5. Default Style with Source Code

1
print 
<!-- HTML generated by techysourcee.blogspot.com -->
<div style="background: #f8f8f8; overflow:auto;width:auto;border:solid gray;border-width:.1em .1em .1em .8em;padding:.2em .6em;"><table><tr><td><pre style="margin: 0; line-height: 125%">1</pre></td><td><pre style="margin: 0; line-height: 125%"><span style="color: #008000; font-weight: bold">print</span> <span style="color: #BA2121">&#39;hello world!&#39;</span>
</pre></td></tr></table></div>

6. Emacs Style with Source Code

1
print 
<!-- HTML generated by techysourcee.blogspot.com -->
<div style="background: #f8f8f8; overflow:auto;width:auto;border:solid gray;border-width:.1em .1em .1em .8em;padding:.2em .6em;"><table><tr><td><pre style="margin: 0; line-height: 125%">1</pre></td><td><pre style="margin: 0; line-height: 125%"><span style="color: #008000; font-weight: bold">print</span> <span style="color: #BB4444">&#39;hello world!&#39;</span>
</pre></td></tr></table></div>

7. Friendly Style with Source Code

1
print 
<!-- HTML generated by techysourcee.blogspot.com -->
<div style="background: #f0f0f0; overflow:auto;width:auto;border:solid gray;border-width:.1em .1em .1em .8em;padding:.2em .6em;"><table><tr><td><pre style="margin: 0; line-height: 125%">1</pre></td><td><pre style="margin: 0; line-height: 125%"><span style="color: #062873; font-weight: bold">print</span> <span style="color: #4070a0">&#39;hello world!&#39;</span>
</pre></td></tr></table></div>

8. Fruity Style with Source Code

1
print 
<!-- HTML generated by techysourcee.blogspot.com -->
<div style="background: #111111; overflow:auto;width:auto;border:solid gray;border-width:.1em .1em .1em .8em;padding:.2em .6em;"><table><tr><td><pre style="margin: 0; line-height: 125%">1</pre></td><td><pre style="margin: 0; line-height: 125%"><span style="color: #fb660a; font-weight: bold">print</span> <span style="color: #0086d2">&#39;hello world!&#39;</span>
</pre></td></tr></table></div>

9. Manni Style with Source Code

1
print 
<!-- HTML generated by techysourcee.blogspot.com -->
<div style="background: #f0f3f3; overflow:auto;width:auto;border:solid gray;border-width:.1em .1em .1em .8em;padding:.2em .6em;"><table><tr><td><pre style="margin: 0; line-height: 125%">1</pre></td><td><pre style="margin: 0; line-height: 125%"><span style="color: #330099; font-weight: bold">print</span> <span style="color: #CC3300">&#39;hello world!&#39;</span>
</pre></td></tr></table></div>

10. Monokai Style with Source Code

1
print 
<!-- HTML generated by techysourcee.blogspot.com -->
<div style="background: #272822; overflow:auto;width:auto;border:solid gray;border-width:.1em .1em .1em .8em;padding:.2em .6em;"><table><tr><td><pre style="margin: 0; line-height: 125%">1</pre></td><td><pre style="margin: 0; line-height: 125%"><span style="color: #f92672">print</span> <span style="color: #e6db74">&#39;hello world!&#39;</span>
</pre></td></tr></table></div>

11. Murphy Style with Source Code

1
print 
<!-- HTML generated by techysourcee.blogspot.com -->
<div style="background: #ffffff; overflow:auto;width:auto;border:solid gray;border-width:.1em .1em .1em .8em;padding:.2em .6em;"><table><tr><td><pre style="margin: 0; line-height: 125%">1</pre></td><td><pre style="margin: 0; line-height: 125%"><span style="color: #007700">print</span> <span style="background-color: #e0e0ff">&#39;hello world!&#39;</span>
</pre></td></tr></table></div>

12. Native Style with Source Code

1
print 
<!-- HTML generated by techysourcee.blogspot.com -->
<div style="background: #202020; overflow:auto;width:auto;border:solid gray;border-width:.1em .1em .1em .8em;padding:.2em .6em;"><table><tr><td><pre style="margin: 0; line-height: 125%">1</pre></td><td><pre style="margin: 0; line-height: 125%"><span style="color: #6ab825; font-weight: bold">print</span> <span style="color: #ed9d13">&#39;hello world!&#39;</span>
</pre></td></tr></table></div>

13. Pastie Style with Source Code

1
print 
<!-- HTML generated by techysourcee.blogspot.com -->
<div style="background: #ffffff; overflow:auto;width:auto;border:solid gray;border-width:.1em .1em .1em .8em;padding:.2em .6em;"><table><tr><td><pre style="margin: 0; line-height: 125%">1</pre></td><td><pre style="margin: 0; line-height: 125%"><span style="color: #bb0066; font-weight: bold">print</span> <span style="color: #dd2200; background-color: #fff0f0">&#39;hello world!&#39;</span>
</pre></td></tr></table></div>

14. Perldoc Style with Source Code

1
print 
<!-- HTML generated by techysourcee.blogspot.com -->
<div style="background: #eeeedd; overflow:auto;width:auto;border:solid gray;border-width:.1em .1em .1em .8em;padding:.2em .6em;"><table><tr><td><pre style="margin: 0; line-height: 125%">1</pre></td><td><pre style="margin: 0; line-height: 125%"><span style="color: #8B008B; font-weight: bold">print</span> <span style="color: #CD5555">&#39;hello world!&#39;</span>
</pre></td></tr></table></div>

15. RRT Style with Source Code

1
print 
<!-- HTML generated by techysourcee.blogspot.com -->
<div style="background: #000000; overflow:auto;width:auto;border:solid gray;border-width:.1em .1em .1em .8em;padding:.2em .6em;"><table><tr><td><pre style="margin: 0; line-height: 125%">1</pre></td><td><pre style="margin: 0; line-height: 125%">print <span style="color: #87ceeb">&#39;hello world!&#39;</span>
</pre></td></tr></table></div>

16. RRT Style with Source Code

1
print 
<!-- HTML generated by techysourcee.blogspot.com -->
<div style="background: #f8f8f8; overflow:auto;width:auto;border:solid gray;border-width:.1em .1em .1em .8em;padding:.2em .6em;"><table><tr><td><pre style="margin: 0; line-height: 125%">1</pre></td><td><pre style="margin: 0; line-height: 125%"><span style="color: #204a87; font-weight: bold">print</span> <span style="color: #4e9a06">&#39;hello world!&#39;</span>
</pre></td></tr></table></div>

17. Trac Style with Source Code

1
print 
<!-- HTML generated by techysourcee.blogspot.com -->
<div style="background: #ffffff; overflow:auto;width:auto;border:solid gray;border-width:.1em .1em .1em .8em;padding:.2em .6em;"><table><tr><td><pre style="margin: 0; line-height: 125%">1</pre></td><td><pre style="margin: 0; line-height: 125%"><span style="color: #000080">print</span> <span style="color: #bb8844">&#39;hello world!&#39;</span>
</pre></td></tr></table></div>

18. Vim Style with Source Code

1
print 
<!-- HTML generated by techysourcee.blogspot.com -->
<div style="background: #000000; overflow:auto;width:auto;border:solid gray;border-width:.1em .1em .1em .8em;padding:.2em .6em;"><table><tr><td><pre style="margin: 0; line-height: 125%">1</pre></td><td><pre style="margin: 0; line-height: 125%"><span style="color: #cccccc">print</span> <span style="color: #cd0000">&#39;hello world!&#39;</span>
</pre></td></tr></table></div>

19. VS Style with Source Code

1
print 
<!-- HTML generated using HTML generated by techysourcee.blogspot.com -->
<div style="background: #ffffff; overflow:auto;width:auto;border:solid gray;border-width:.1em .1em .1em .8em;padding:.2em .6em;"><table><tr><td><pre style="margin: 0; line-height: 125%">1</pre></td><td><pre style="margin: 0; line-height: 125%">print <span style="color: #a31515">&#39;hello world!&#39;</span>
</pre></td></tr></table></div>